Angkor Wat Sunrise: 7 Best Viewing Spots for US Photographers
Planning Your Angkor Wat Sunrise Photography Trip US Travel Tips
Okay, so you're dreaming of that iconic Angkor Wat sunrise shot, the one that graces countless travel magazine covers. You're a US photographer (or aspiring one!), and you're ready to brave the early morning wake-up call. Awesome! But before you even think about packing your gear, let's talk logistics. Getting to Siem Reap from the US is a journey, so plan accordingly. Consider flying into Siem Reap International Airport (REP) directly, though often a layover in Bangkok (BKK) or Kuala Lumpur (KUL) is required. Visa on arrival is generally straightforward for US citizens, but double-check the latest requirements before you go. And remember, Siem Reap is HOT and HUMID, especially during peak season (November to March). Pack light, breathable clothing, and hydrate like your life depends on it (because it kinda does!). Don't forget your mosquito repellent!
Now, let's talk timing. Angkor Wat is ridiculously popular, and sunrise is prime time. I'm talking hordes of tourists. To snag a good spot, you need to arrive EARLY. I'm talking at least an hour, maybe even two, before sunrise. Seriously. Consider hiring a tuk-tuk driver for the duration of your stay. They're affordable, reliable, and know the best routes (and shortcuts!). Negotiate the price upfront. And don't be afraid to ask for recommendations – they often know the hidden gems and best places to eat.
Top 7 Angkor Wat Sunrise Photography Locations US Photographer's Guide
Alright, let's get to the good stuff! Here are my top 7 picks for capturing that perfect Angkor Wat sunrise, tailored for the US photographer seeking that killer shot:
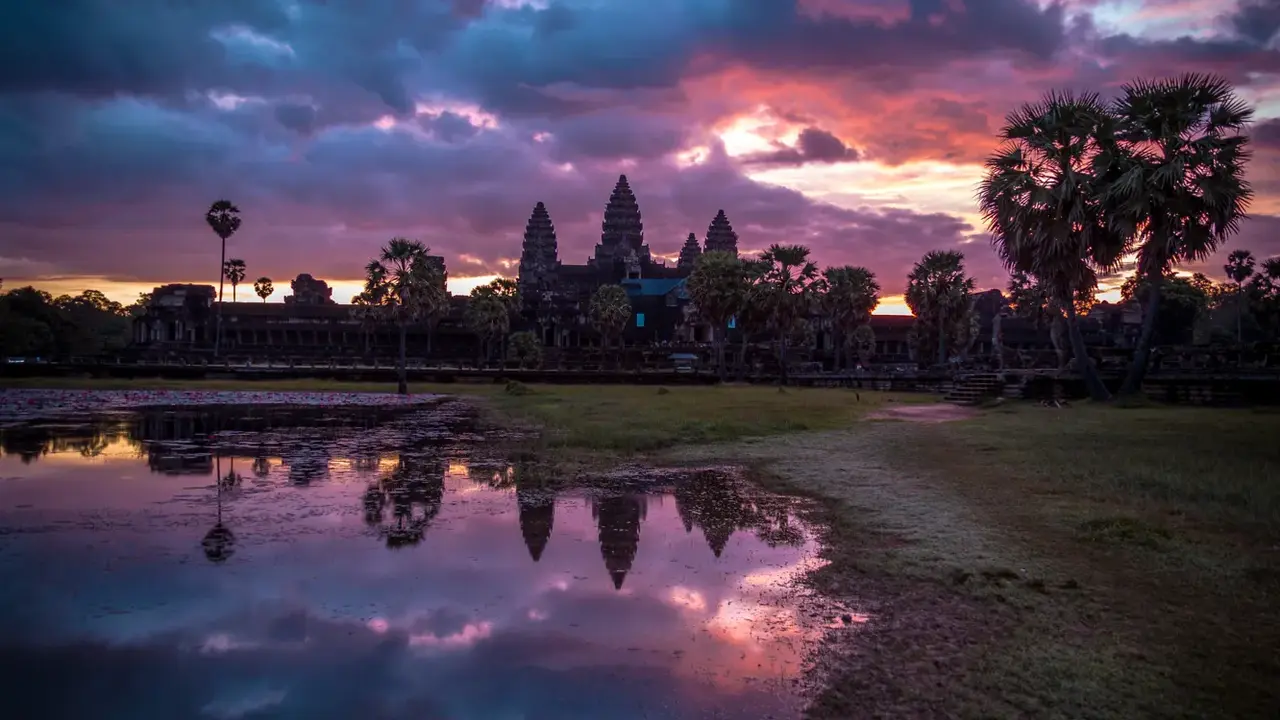
- The Reflecting Pools (The Classic View): This is the iconic spot, the one you see in all the photos. It's located directly in front of Angkor Wat. The reflection of the temple in the pools is stunning, especially as the sun rises. BUT, be warned: it's CROWDED. Get there ridiculously early (like 5 AM) to secure a decent position. Bring a wide-angle lens (like a 16-35mm) to capture the entire scene. A tripod is essential for long exposures in the pre-dawn light. Consider using a neutral density (ND) filter to balance the exposure and create a dreamy, ethereal effect. The downside? Everyone else is there too. You'll be shoulder-to-shoulder with other photographers.
- The Library Terrace (A Slightly Elevated Perspective): Head to the terrace of one of the libraries (the buildings flanking the main entrance). This gives you a slightly elevated perspective, which can help you avoid some of the crowds. You'll still get a great view of the temple and the reflecting pools. This spot is also good if you want to include some foreground elements in your composition, like the trees or the other temple structures. A mid-range zoom lens (like a 24-70mm) is a good choice here.
- The Western Side (A Different Angle): Most people focus on the eastern side for sunrise, but the western side can also offer some interesting perspectives. The light might not be as dramatic, but you'll likely have fewer crowds. Explore the area around the western entrance and see what you can find. This is a good option if you're looking for a more unique and less predictable shot. A telephoto lens (like a 70-200mm) can be useful for isolating details and compressing the perspective.
- Phnom Bakheng (A Panoramic View): This temple mount offers panoramic views of Angkor Wat and the surrounding countryside. It's a bit of a climb to get to the top, but the views are worth it. However, access is limited to a certain number of people each day, so you'll need to get there early to secure a spot. Also, be aware that the temple is quite fragile, so you'll need to be careful when walking around. A wide-angle lens is essential for capturing the panoramic view. Be prepared for crowds and limited space.
- Pre Rup (Another Temple Mount Option): Similar to Phnom Bakheng, Pre Rup offers elevated views, although not quite as panoramic. It's less crowded, making it a good alternative if Phnom Bakheng is full. It's also further away from Angkor Wat, so bring a telephoto lens if you want to zoom in on the temple. The red brick of Pre Rup also provides a nice contrast with the green jungle.
- From a Hot Air Balloon (The Ultimate View - Pricey!): For the ultimate sunrise experience, consider taking a hot air balloon ride over Angkor Wat. This is definitely the most expensive option, but it offers unparalleled views of the temple and the surrounding landscape. Book your flight in advance, as they tend to sell out quickly. A wide-angle lens is a must for capturing the expansive views. Be aware that the balloon doesn't fly directly over Angkor Wat, but it still provides incredible photo opportunities. Prepare for some serious sticker shock on the price.
- Hidden Spots (Explore and Discover!): The best way to find your own unique sunrise spot is to simply explore. Get up early, wander around, and see what you can find. There are countless little nooks and crannies around Angkor Wat that offer interesting perspectives. Don't be afraid to get off the beaten path. Talk to your tuk-tuk driver – they often know secret spots that aren't on the tourist maps.
Essential Photography Gear for Angkor Wat Sunrise US Photographer Recommendations
Okay, let's talk gear. Here's what I recommend bringing for your Angkor Wat sunrise photography adventure, keeping in mind the needs of a US photographer:
- Camera: Obviously! A DSLR or mirrorless camera is ideal for capturing high-quality images. Full-frame sensors generally perform better in low light, but a crop-sensor camera will also work well. Consider bringing a backup camera body in case of equipment failure.
- Lenses: A versatile lens kit is essential. I recommend a wide-angle lens (16-35mm), a mid-range zoom lens (24-70mm), and a telephoto lens (70-200mm). This will allow you to capture a variety of shots, from wide landscapes to close-up details.
- Tripod: Absolutely essential for long exposures in the pre-dawn light. Choose a sturdy tripod that can handle the weight of your camera and lens. Carbon fiber tripods are lightweight and durable, making them ideal for travel.
- Filters: A neutral density (ND) filter is useful for balancing the exposure and creating a dreamy effect. A polarizing filter can help reduce glare and enhance colors.
- Remote Shutter Release: This will help you avoid camera shake when taking long exposures.
- Extra Batteries and Memory Cards: You don't want to run out of power or storage space in the middle of your shoot! Bring plenty of extra batteries and memory cards.
- Rain Cover: Angkor Wat is located in a tropical climate, so be prepared for rain. A rain cover will protect your camera gear from the elements.
- Camera Bag: Choose a comfortable and functional camera bag that can hold all of your gear. A backpack is a good option for carrying your equipment around Angkor Wat.
Product Recommendations for Angkor Wat Photography US Photographer's Budget Options
Let's get specific with some product recommendations, catering to different budgets:
- Camera (Entry-Level): Canon EOS Rebel SL3 / 250D ($599 with kit lens). A great entry-level DSLR that's lightweight and easy to use. Offers good image quality and 4K video recording. Perfect for beginners. Sony Alpha a6000 ($548 with kit lens). A popular mirrorless camera known for its fast autofocus and compact size. A good alternative to a DSLR.
- Camera (Mid-Range): Sony Alpha a7 III ($1698 body only). A full-frame mirrorless camera with excellent image quality, autofocus, and low-light performance. A great choice for serious photographers. Nikon D7500 ($1296 body only). A crop-sensor DSLR with a robust build and excellent image quality. A good option for those who prefer DSLRs.
- Camera (High-End): Sony Alpha a7R IV ($3498 body only). A high-resolution full-frame mirrorless camera with stunning image quality. Ideal for landscape and portrait photography. Canon EOS 5D Mark IV ($2499 body only). A full-frame DSLR with excellent image quality, autofocus, and video capabilities. A professional-grade camera for serious photographers.
- Wide-Angle Lens (Budget): Rokinon 14mm f/2.8 ($329). A manual focus lens that offers excellent image quality at a low price. A good option for landscape photography.
- Wide-Angle Lens (Mid-Range): Tamron 17-28mm f/2.8 Di III RXD ($899). A compact and lightweight zoom lens that offers excellent image quality and autofocus performance. A good choice for Sony mirrorless cameras.
- Wide-Angle Lens (High-End): Sony FE 16-35mm f/2.8 GM ($2198). A professional-grade zoom lens with exceptional image quality and autofocus performance. A great choice for Sony mirrorless cameras.
- Tripod (Budget): AmazonBasics Lightweight Tripod ($30). A basic tripod that's suitable for beginners. It's lightweight and easy to carry, but it's not as sturdy as more expensive options.
- Tripod (Mid-Range): Manfrotto Befree Advanced ($199). A lightweight and compact tripod that's ideal for travel. It's sturdy enough to support most cameras and lenses.
- Tripod (High-End): Really Right Stuff TVC-24L (Starting at $995). A professional-grade tripod that's incredibly sturdy and durable. It's expensive, but it's worth the investment if you're serious about photography. Requires a separate head.
Product Comparisons for Angkor Wat Photography US Photographer's Guide
Choosing the right gear can be overwhelming. Here's a quick comparison to help you decide:
- Canon EOS Rebel SL3 vs. Sony Alpha a6000: The Canon is a bit cheaper and has a more traditional DSLR design. The Sony is more compact and has faster autofocus. Both are great entry-level options.
- Sony Alpha a7 III vs. Nikon D7500: The Sony is a full-frame mirrorless camera, while the Nikon is a crop-sensor DSLR. The Sony generally performs better in low light and has more advanced features. The Nikon is more affordable and has a longer battery life.
- Rokinon 14mm f/2.8 vs. Tamron 17-28mm f/2.8: The Rokinon is a manual focus lens, while the Tamron has autofocus. The Tamron is also a zoom lens, while the Rokinon is a prime lens. The Rokinon is much cheaper, but the Tamron offers more versatility.
- AmazonBasics Lightweight Tripod vs. Manfrotto Befree Advanced: The AmazonBasics tripod is very affordable, but it's not very sturdy. The Manfrotto Befree Advanced is more expensive, but it's much sturdier and more reliable.
Using Your Gear at Angkor Wat Sunrise US Photographer's Tips
Okay, you've got your gear, you've chosen your spot, now what? Here are some tips for using your gear effectively at Angkor Wat sunrise:
- Shoot in RAW: This will give you the most flexibility when editing your photos.
- Use Manual Mode: Take control of your camera settings to get the perfect exposure.
- Experiment with Different Compositions: Don't just settle for the standard shot. Try different angles and perspectives.
- Use a Graduated Neutral Density Filter: This will help you balance the exposure between the sky and the foreground.
- Pay Attention to the Light: The light changes rapidly during sunrise, so be prepared to adjust your settings accordingly.
- Be Patient: The best light often happens just before or just after sunrise.
- Don't Be Afraid to Experiment: Try different techniques and see what works best for you.
- Respect the Temple: Be mindful of your surroundings and avoid disturbing other visitors.
Post-Processing Your Angkor Wat Sunrise Photos US Photographer Workflow
The work doesn't end when you click the shutter! Post-processing is an essential part of the photography workflow. Here's a basic workflow for editing your Angkor Wat sunrise photos:
- Import your photos into your editing software (Lightroom, Capture One, etc.):
- Adjust the white balance: Get the colors looking accurate.
- Adjust the exposure: Brighten or darken the image as needed.
- Adjust the contrast: Add or reduce contrast to make the image pop.
- Adjust the highlights and shadows: Recover detail in the highlights and shadows.
- Adjust the clarity and vibrance: Add some punch to the colors and details.
- Sharpen the image: Add some sharpness to make the image look crisp.
- Remove any distractions: Clone out any unwanted elements in the scene.
- Export the image: Save the image in the desired format and resolution.
Respecting the Culture and Environment at Angkor Wat US Travel Etiquette
Finally, remember to be a respectful traveler. Angkor Wat is a sacred site, so dress modestly (shoulders and knees covered). Don't climb on any structures that are off-limits. Be mindful of your noise level. And most importantly, be respectful of the local culture and environment. Leave no trace behind. Support local businesses. Learn a few basic Khmer phrases. A little respect goes a long way.
:max_bytes(150000):strip_icc()/277019-baked-pork-chops-with-cream-of-mushroom-soup-DDMFS-beauty-4x3-BG-7505-5762b731cf30447d9cbbbbbf387beafa.jpg)